Honda Fit/Jazz - Transmission Range Switch Replacement (CVT)

Transmission Range Switch Replacement
| 1. | Remove the air cleaner housing and intake air duct.
|
| 3. | Disconnect the transmission range switch connector.
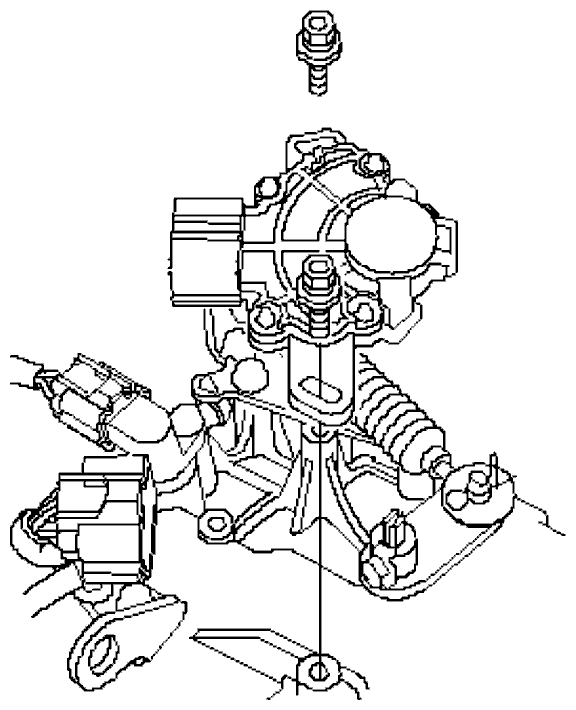 |
| 4. | Remove the old transmission range switch, and replace the switch with a new one.
|
| 5. | Make sure that the control lever (A) is in N position. If necessary, move the control lever to N position. Do not squeeze the control shaft tips (B) together when shift to N position. If the tips are squeezed together will cause a faulty signal or position due to the play between the control shaft and the switch.
 |
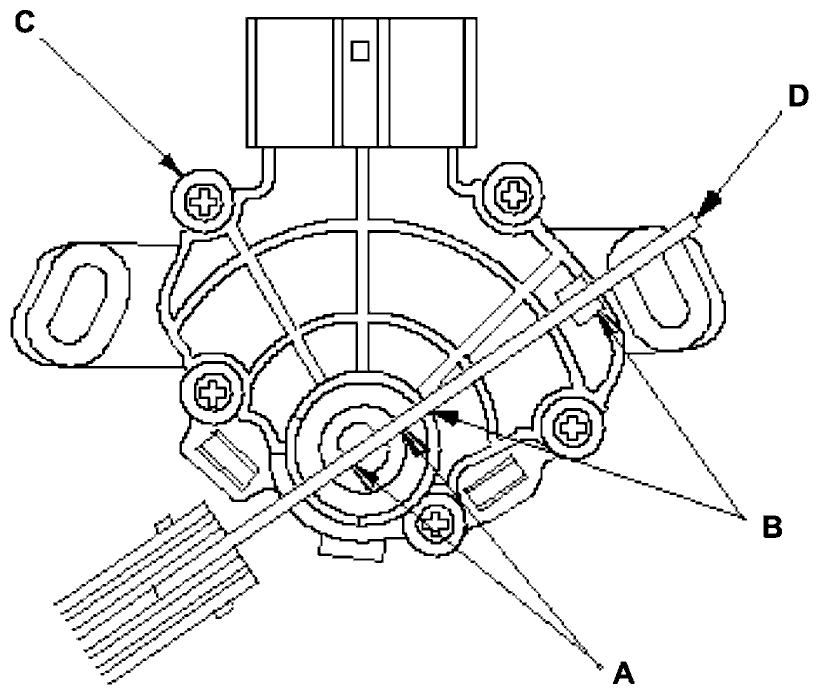
| 6. | Align the cutout (A) on the rotary-frame with the neutral positioning cutouts (B) on the new transmission range switch (C), then put a 2.0 mm (0.08 in.) feeler gauge blade (D) in the cutouts to hold it in the N position. Be sure to use a 2.0 mm (0.08 in.) blade or equivalent to hold the switch in N position.
 |
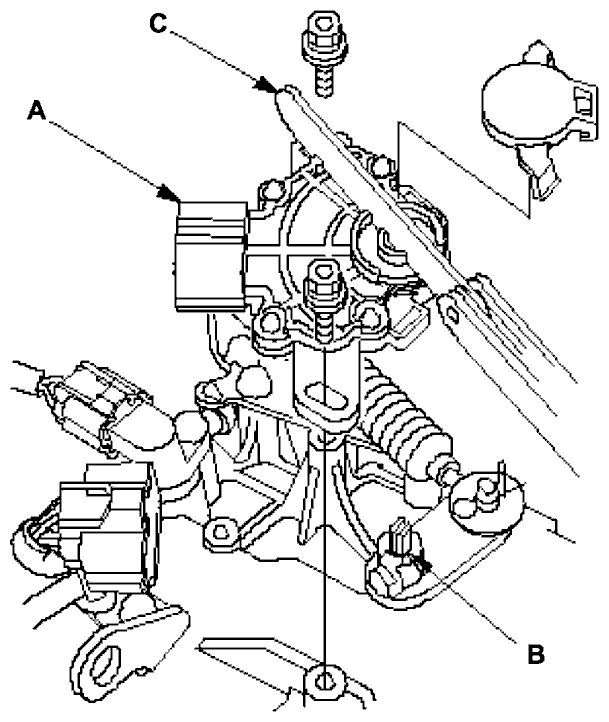
| 7. | Insert the transmission range switch (A) gently on the control shaft (B) with holding the N position with the 2.0 mm (0.08 in.) blade (C).
 |
| 8. | Tighten the bolts on the transmission range switch while you continue to hold the N position. Do not move the transmission range switch when tightening the bolts.
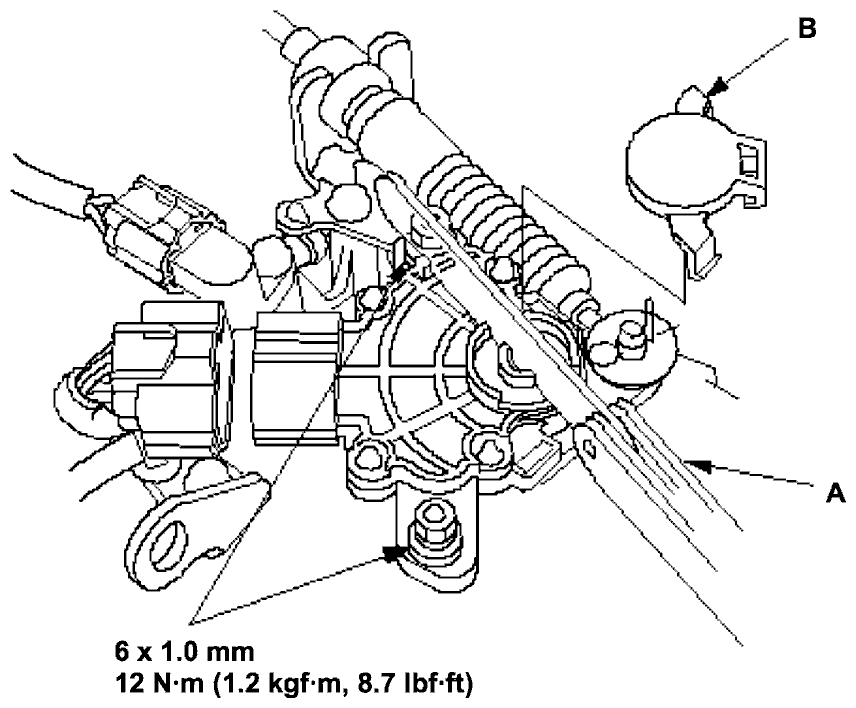 |
| 9. | Remove the feeler gauge (A), then install the rotary frame cover (B).
|
| 10. | Connect the transmission range switch connector.
|
| 11. | Turn the ignition switch ON (II). Move the shift lever through all gear positions, and check the transmission range switch synchronization with the A/T gear position indicator.
 |
| 12. | Check that the engine can start in P and N positions, and cannot start in any other shift lever position.
|
| 13. | Check that the back-up lights come on when the shift lever is in R position.
|
| 14. | Allow the wheels to rotate freely, then start the engine, and check the shift lever operation.
|
| 15. | Install the air cleaner housing and intake air duct.
|
Honda Fit/Jazz 02-05 Workshop Manual
Back to all Manuals
